TurnKey Auto Call: 319-683-2850 Text: 319-331-8796
  • Home
  • Inventory
  • Recently Sold
  • About Us
  • Contact
  • Angie's Blog/Recipes

One Potato, Two Potato, Three Potatoes, Oh Heck, You Know What I Mean!

8/23/2015

 
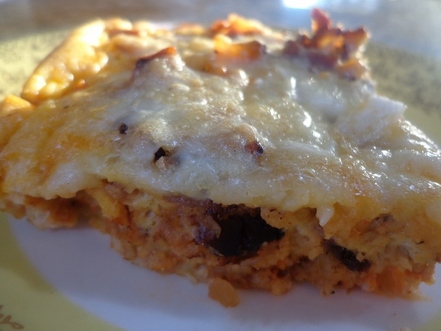
Look at these cute little 
Twice Baked Potato Cups with Caramelized Shallots!
Picture


I was searching for a twice baked potato recipe that was a bit more upscale that the usual cheddar, 
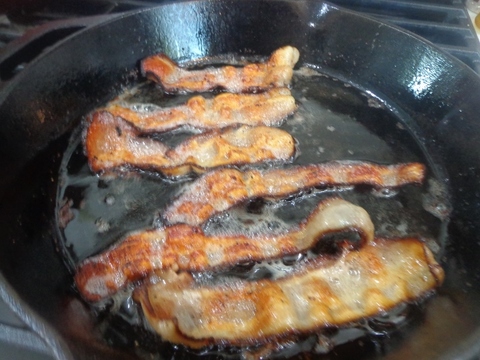
bacon and scallions. 
There's sooooo many recipes with those common ingredients and I just really wanted to do something different.
Picture


Picture
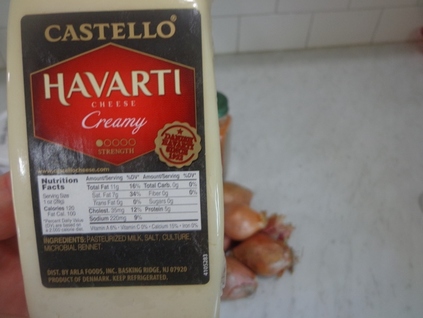
This recipe calls for Havarti cheese, 


a nice creamy change to the usual cheddar.


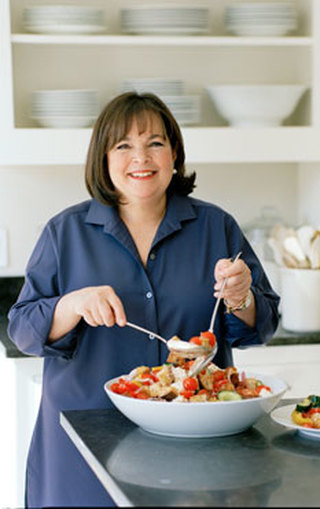
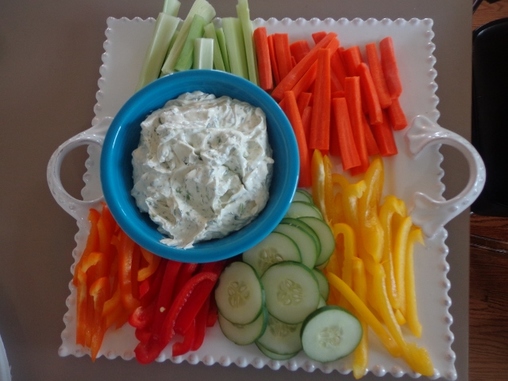
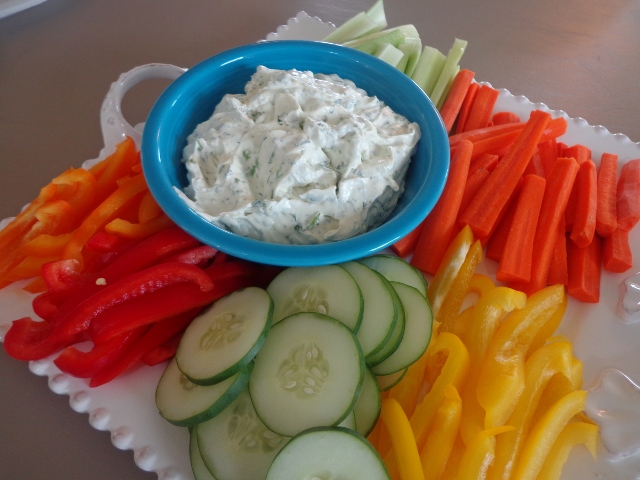
I served these potatoes with steak and a veggie plate with homemade dill dip at a luncheon one day. 
Yes, I served steak at a luncheon and it was awesome :)
Picture

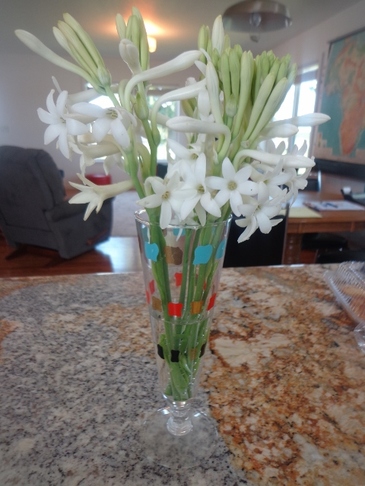
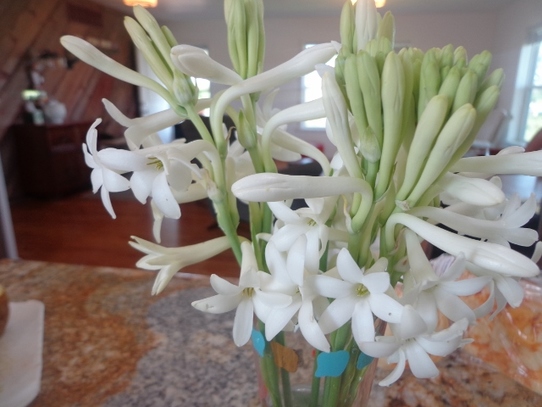
I saw these flowers at the Amish bakery 
that morning and grabbed them for a little centerpiece. 


I think these are called Tuberose, maybe?


Picture


I love the light green and 
white 
colors!


Picture


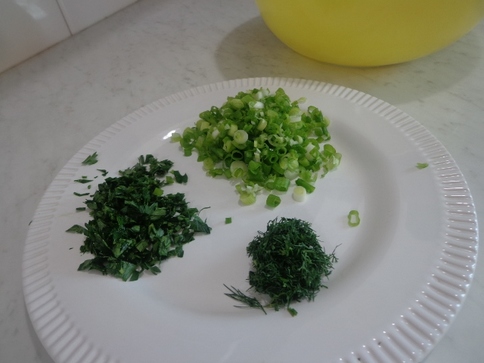
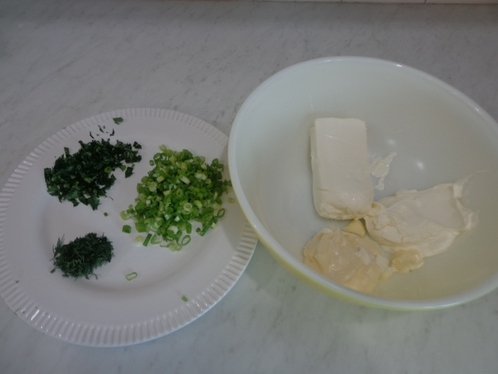
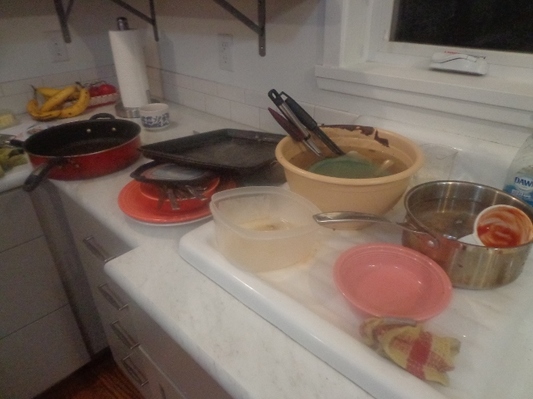
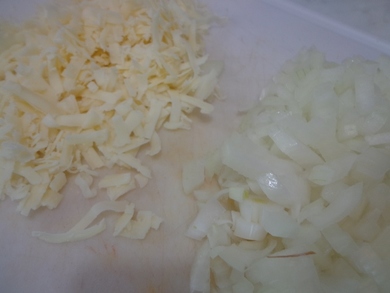
Anyhoo, these are the fixins for these cutie, elegant twice baked potatoes...
Picture


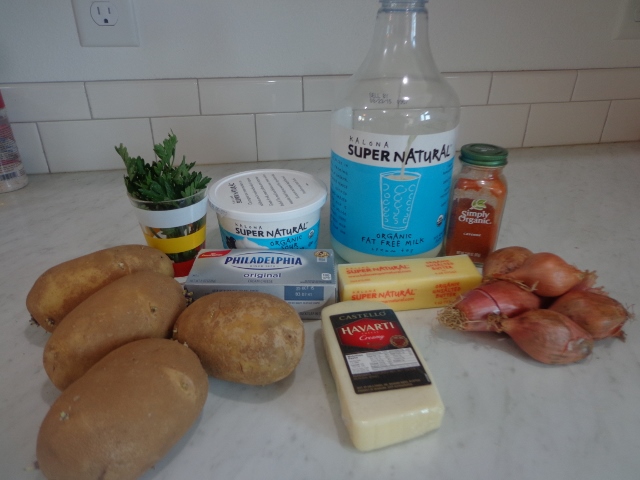
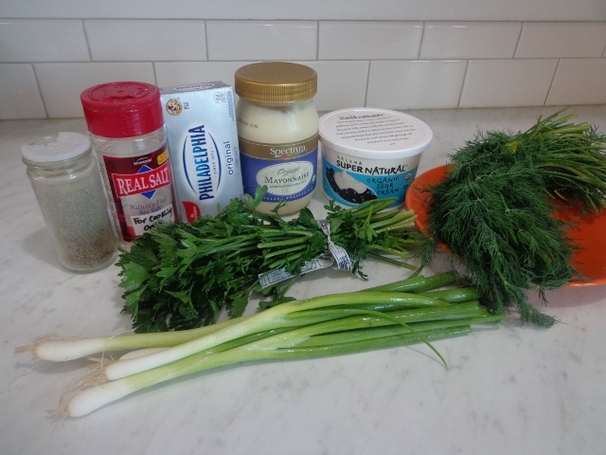
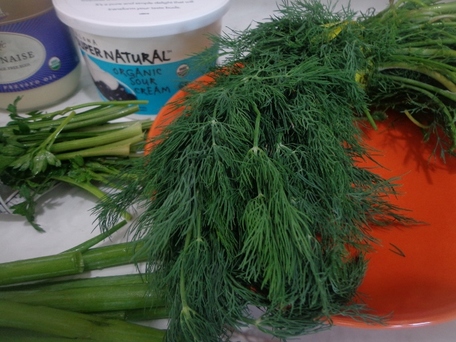
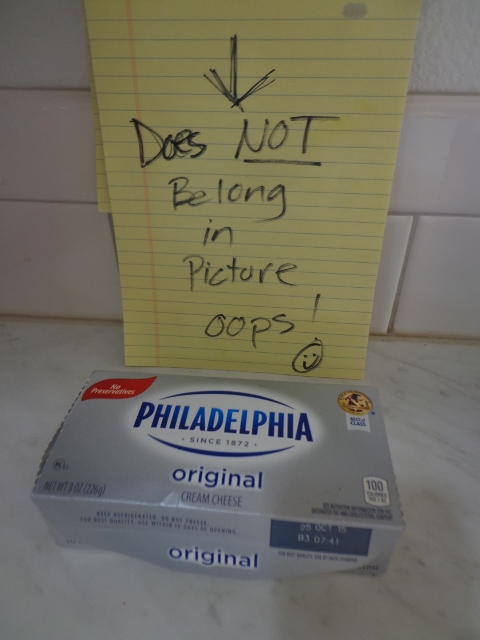
I have no idea why I stuck the cream cheese in the fixins picture, 
but it doesn't belong there. OOps!!
Picture


This recipe is from www.epicurious.com, 
originally published from Bon Appetit , November 2002 issue.
Just click HERE to go directly to the recipe to print off!


Twice-Baked Potato Cups with Caramelized Shallots
Straight outta www.epicurious.com, from November 2002 Bon Appetit
Ingredients
  • 4 12-ounce russet potatoes, scrubbed
  • Vegetable oil
  • 1 cup coarsely grated Havarti cheese (about 4 ounces)
  • 1/2 cup sour cream
  • 1/4 cup whole milk
  • 1/4 teaspoon cayenne pepper
  • 3 tablespoons butter
  • 1 1/2 cups thinly sliced shallots (about 8 ounces)
  • 1 tablespoon chopped fresh Italian parsley

PreparationPreheat oven to 400°F. Pierce potatoes in several places with fork, then brush lightly with oil. Place potatoes directly on oven rack and bake until tender when pierced with fork, about 55 minutes. Cool potatoes slightly.

Cut off thin slice from both short ends of each potato and discard. Cut each potato crosswise in half; stand each half on its small flat end. Using teaspoon, scoop out cooked potato pulp from each half, leaving 1/3-inch-thick shell and forming potato cup. Place potato cups in 13x9x2-inch glass baking dish. Place potato pulp in medium bowl; add cheese, sour cream, milk, and cayenne. Using potato masher or fork, mash until well blended and almost smooth. Season to taste with salt and pepper. Mound mashed potato mixture in potato cups.

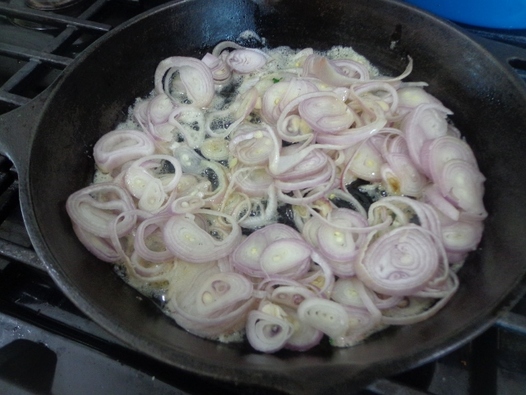
Melt butter in heavy medium skillet over medium heat. Add shallots and sauté until tender and deep brown, about 12 minutes. Top potato cups with shallots. (Can be made 1 day ahead. Cover and chill.)

Preheat oven to 350°F. Bake potato cups until heated through, about 20 minutes. Sprinkle with parsley and serve.


Picture
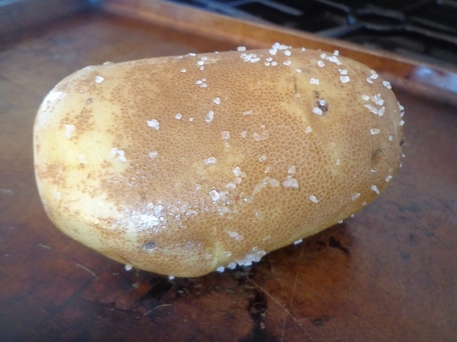
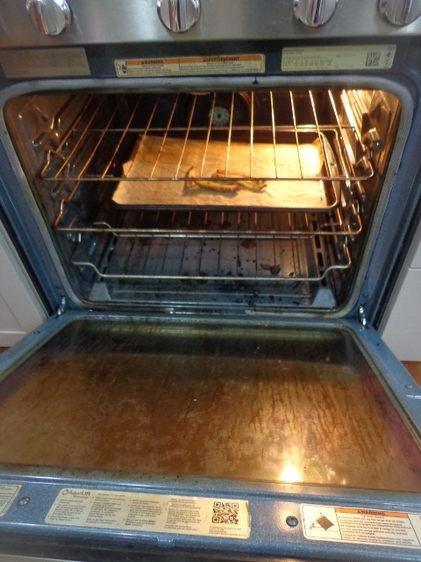
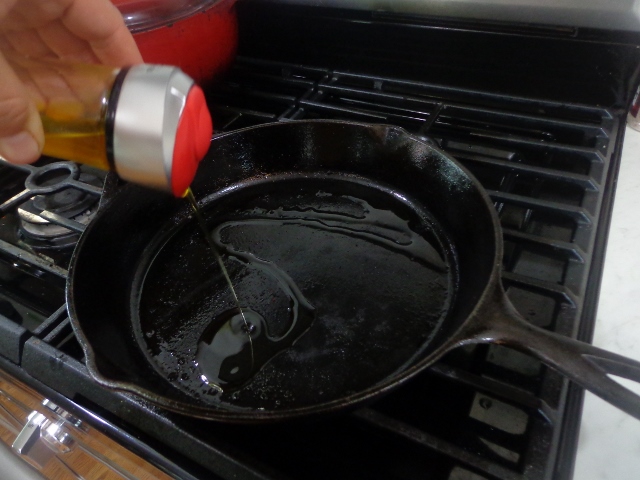
So let's start by rubbing olive oil (and I rubbed salt too) on the outsides of the 
baking potatoes, 


prick them with forks,

 and bake until tender.


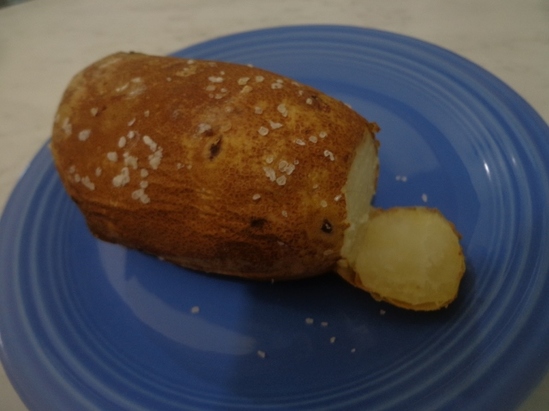
Once the potatoes are baked, cut off a thin slice from both short ends of each potato. 
This will make the potato stand upright on the dinner plate.
Picture


Picture
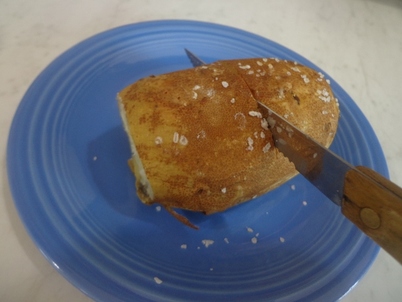
Now cut the potato crosswise 


in half


Picture
See how it stands up on it's own! 


It's like magic!


The band America (who is from England in fact) (wrap your head around THAT one) agrees you can do magic too!


I love America, very nostalgic 70s music.


Especially Ventura Highway.


 Classic.


And this song always reminds me of my younger sister, who is a blondie.


Okay, that's enough play time, now back to work!
Picture
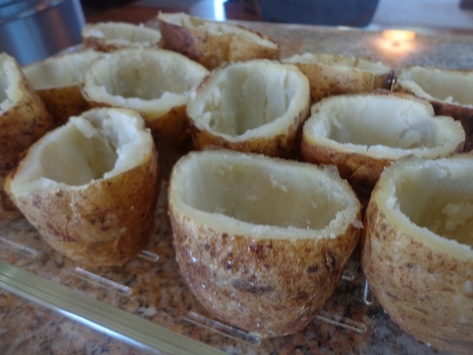
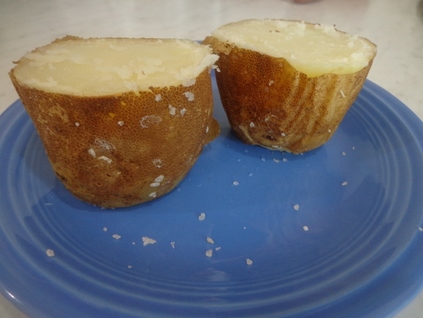
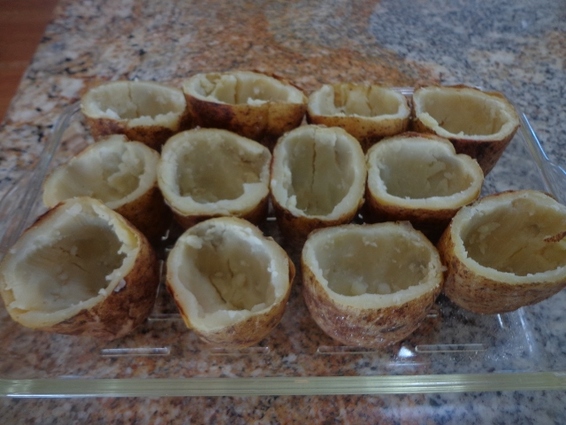
I wanted to mention to make sure to leave 1/3 inch of the potato when you're scooping out the pulp. 


This keeps the vessel structured for when all the fixins gets put back in.


Here's what they should look like all scooped out...
Picture


Picture


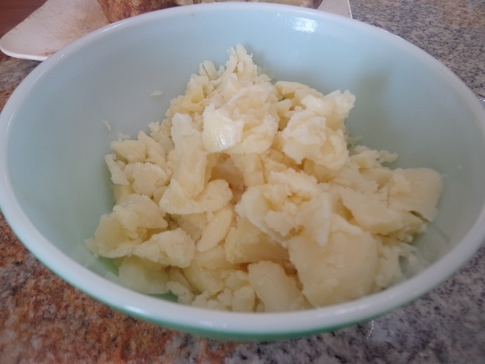
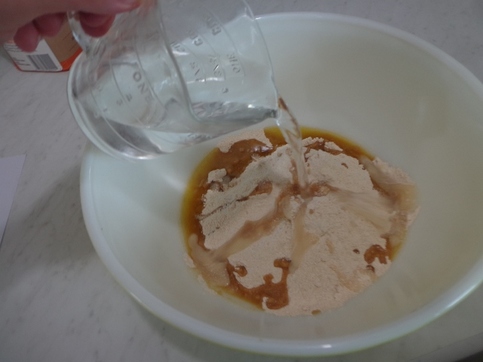
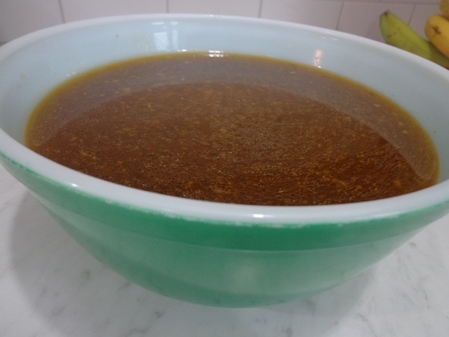
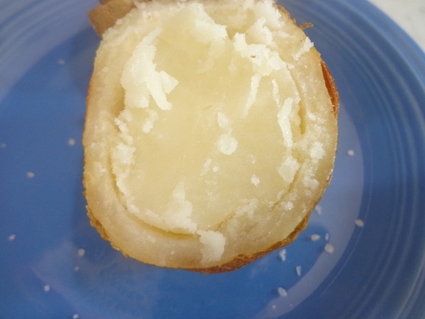
So now you have all the scooped potatoes in a bowl.


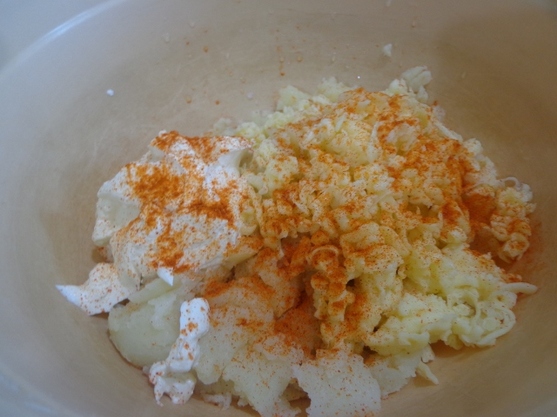
Add the sour cream, the creamy Havarti cheese, 

milk and cayenne pepper.
Picture


Picture
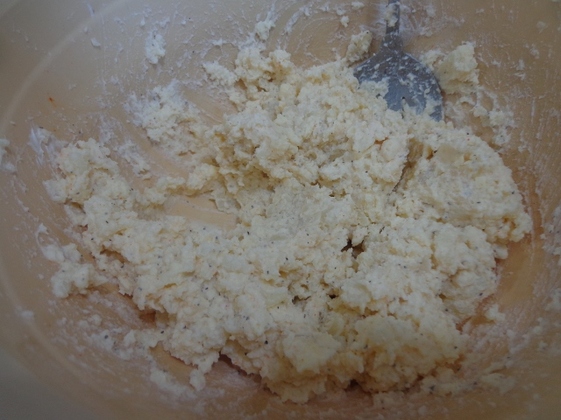
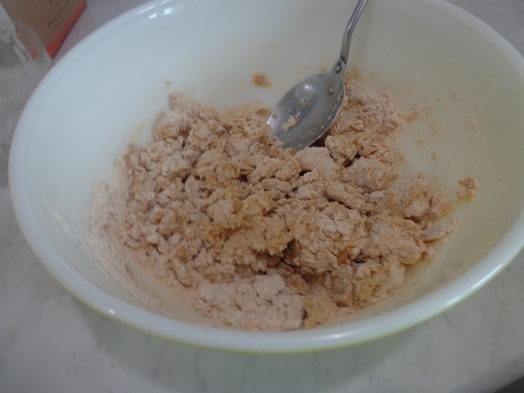
This picture is dark but mash it all up with a potato masher


 and throw in some

 salt and pepper.


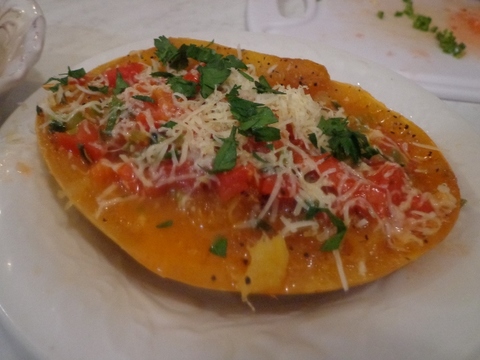
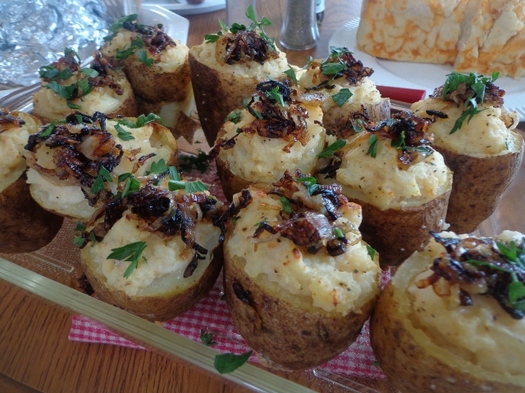
Now we get to the good stuff....
stuff each of those potato cups!
Picture


Picture

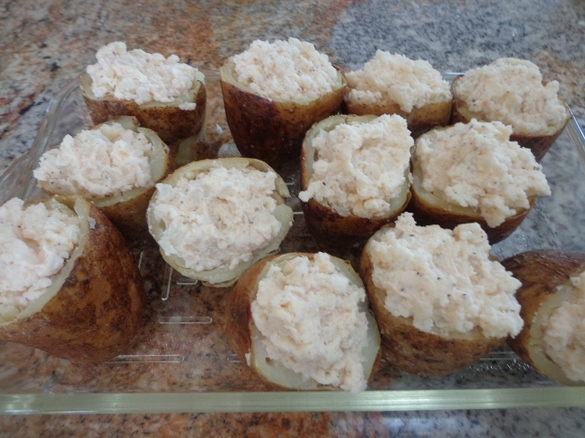
How cute are these??  


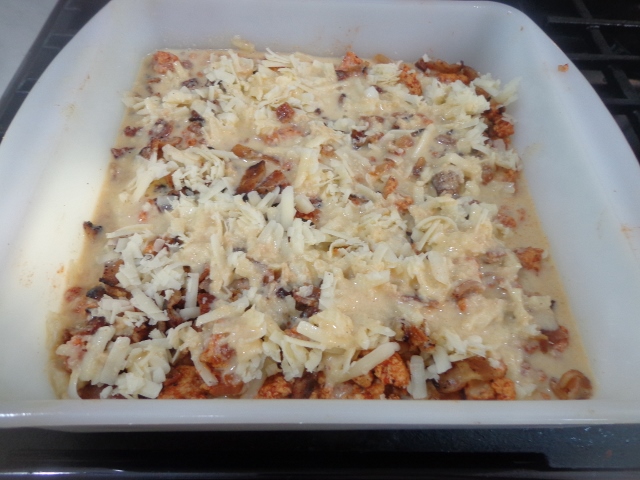
All they need is a bit of topping to them, but before that, bake these up for 20 minutes.


So let's work on that topping by caramelizing these shallots, shall we!
Picture


Picture
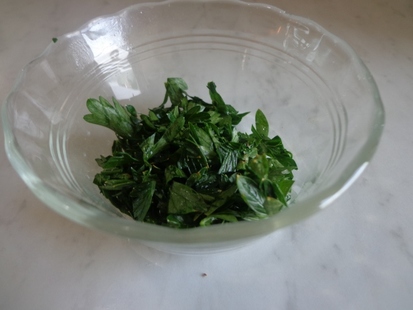
Don't forget to chop up some Italian parsley!


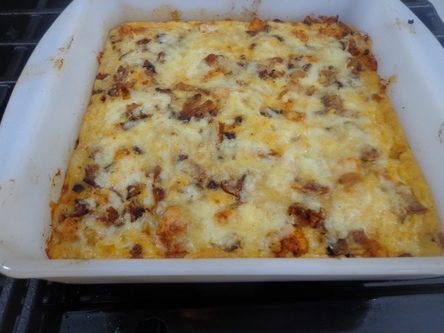
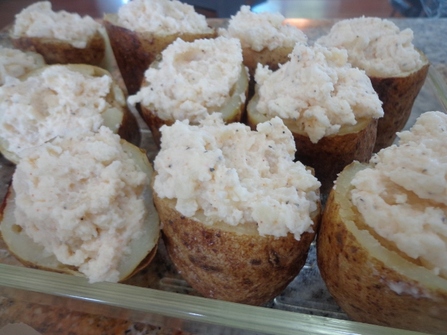
Sprinkle up the parsley and caramelized shallots on top of the potato cups after they've baked for 20 minutes.
Picture


Picture
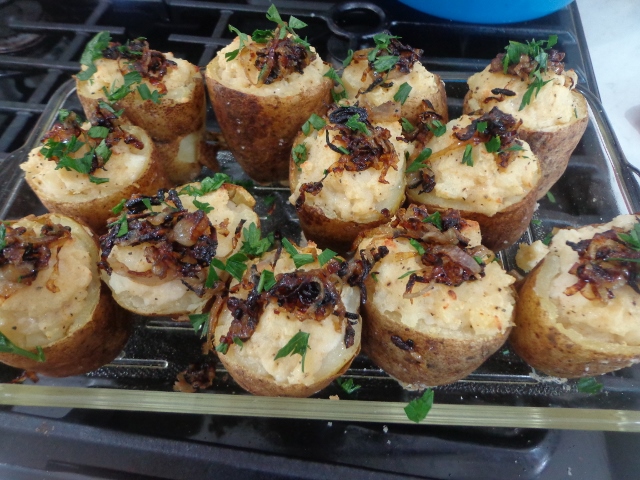
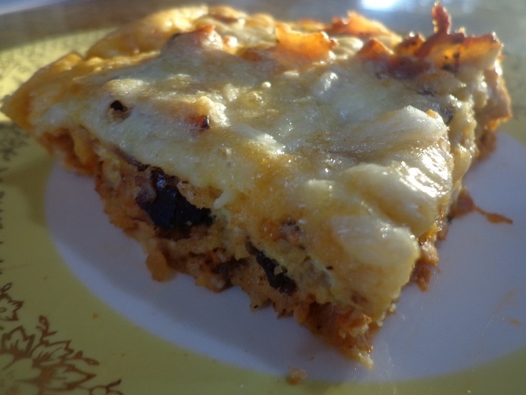
The inside is so mild and creamy and that caramelized shallot topping is such a yummy contrast.


These are festive twice baked potatoes. 
The crunchy outside skin is delicious too!
Your family or guests will eat the whole thing up and several will go back for a second one if you have enough. 
Picture


So I hope you try these potatoes 
out sometime! 
They are just as good warmed up the next day!

Again, to print off the recipe, just click HERE to go straight to the Epicurious recipe page.


Picture


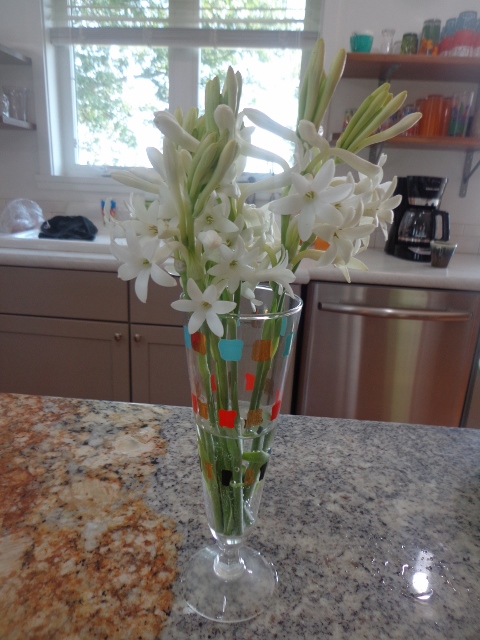
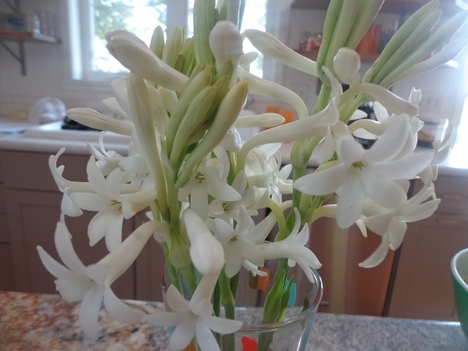
Okay, so anyway remember at the beginning when I talked about these Tuberose?


Well, the "vase" the flowers are in 


is actually a vintage bar glass.


I picked up this pair of beer glasses (beer? are they beer glasses?) at an antique shop somewhere along the way on a quick road trip to St. Louis.
Picture


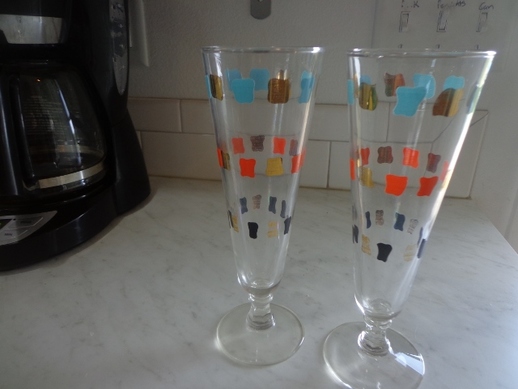
I love the 70s colors!

That gold!


I also like these tall whimsical glasses from the 70s 
as well...
Picture


Picture


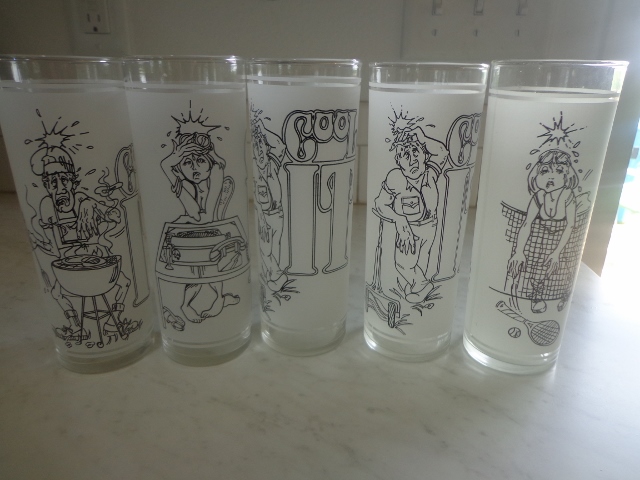
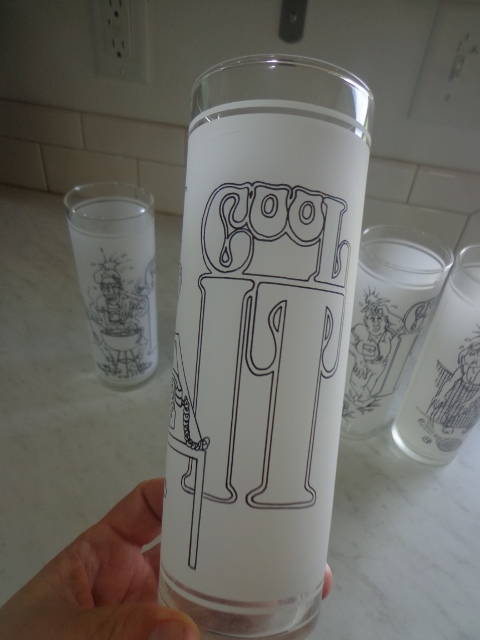
Each glass has "Cool It" 
on it.


Soooo 70s!


It's funny I have all these cool bar glasses when in fact, all I drink is wine or an occasional beer. This explains why I don't know the name of the following bar glasses, like what kind of drink is served in them. But I love them.
Picture


Picture


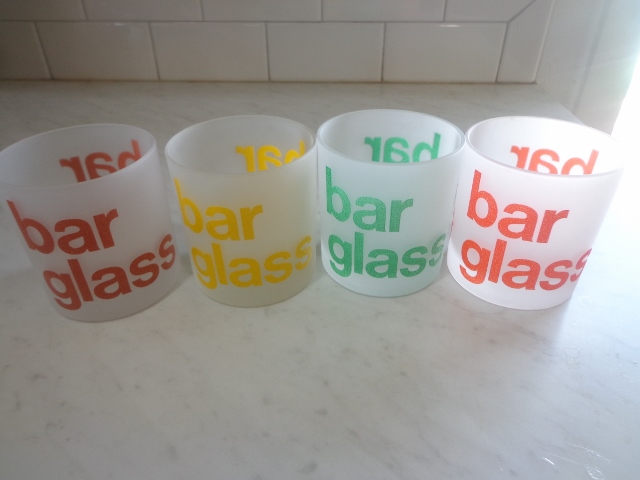
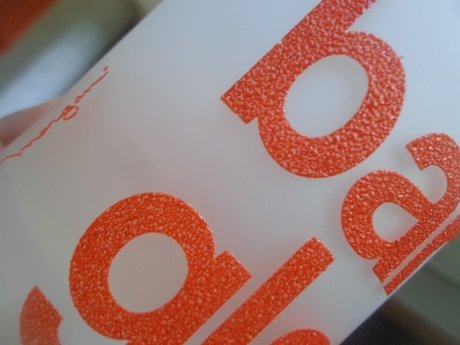
I'm a texture girl and I love me this textured printing.

Picture


Of course no bar is complete without a vintage shaker.


And by "bar", 
I mean the place that holds the 
wax paper 
microwave 
copy machine
checkbook 
cookbooks
phone 
calculator
and overall crap catch-all for the house. 
Picture
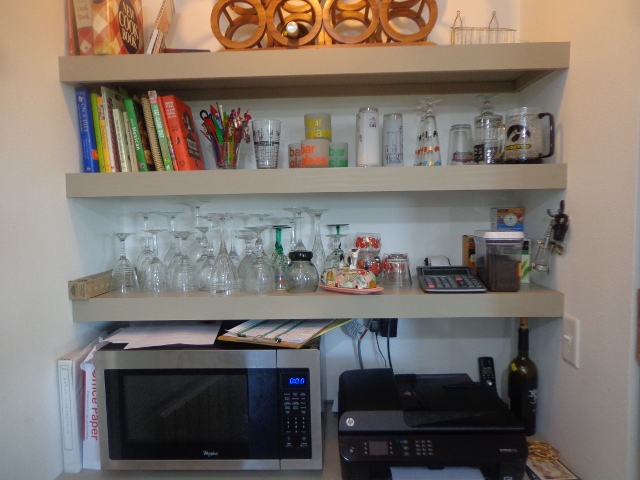
Oh STOP BEING SO JEALOUS! IT'S UNBECOMING!


Picture


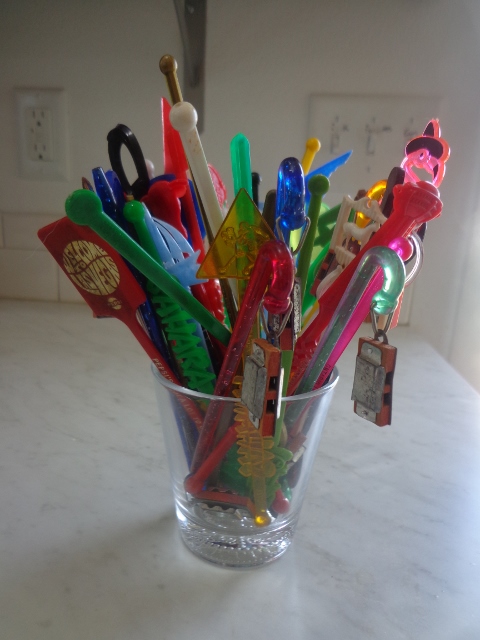
I do like this collection of drink stirrers though, 


many are vintage.


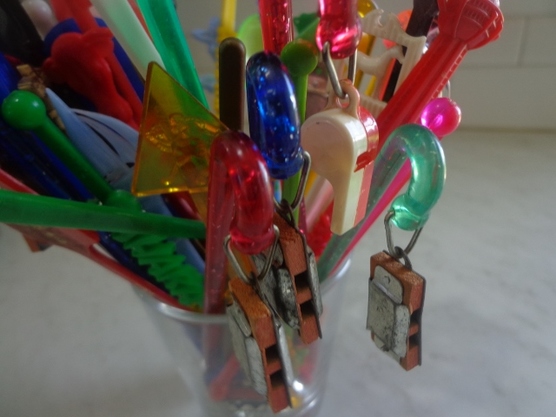
See the little whistles and harmonicas hanging off some of 

the stirrers?
Picture

Dear Readers,

You may want to think twice about letting your  3 1/2 year old grandson play with drink stirrers, mainly the ones with the working whistles.

You can thank me later.

Love, 
Angie 

Picture
Almost done! 

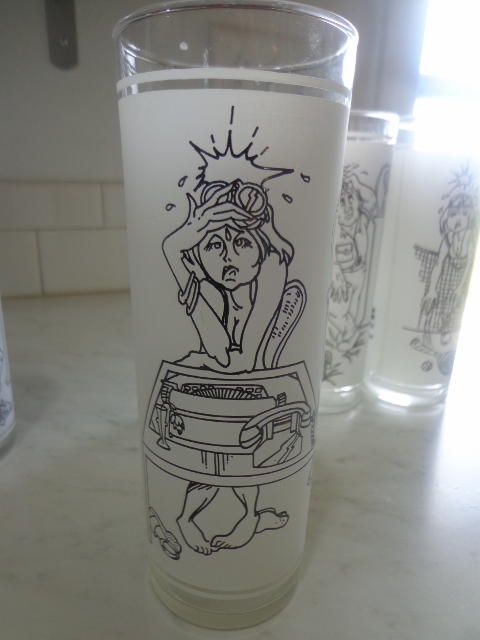
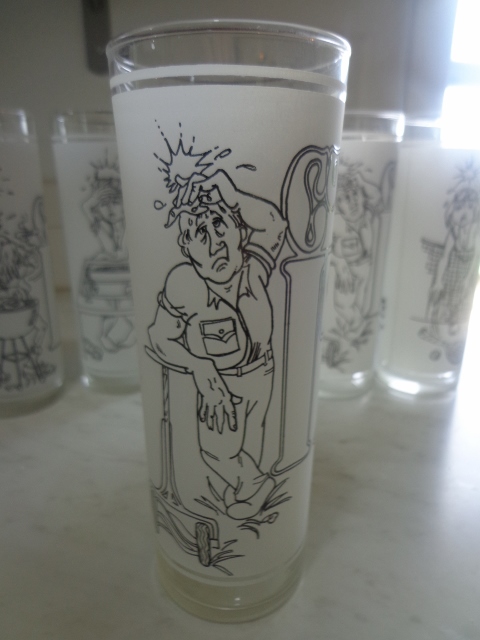
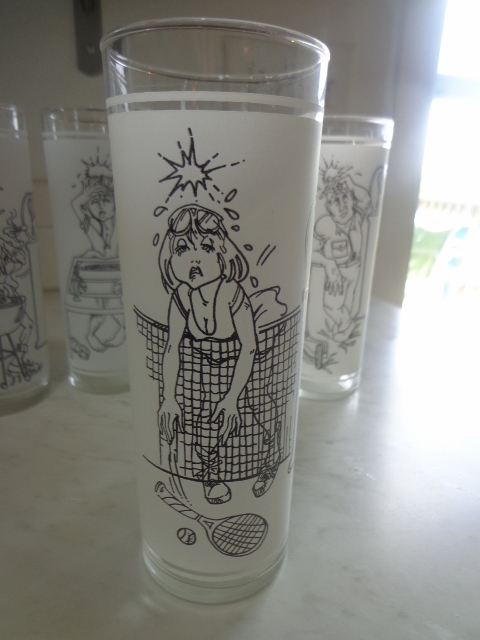
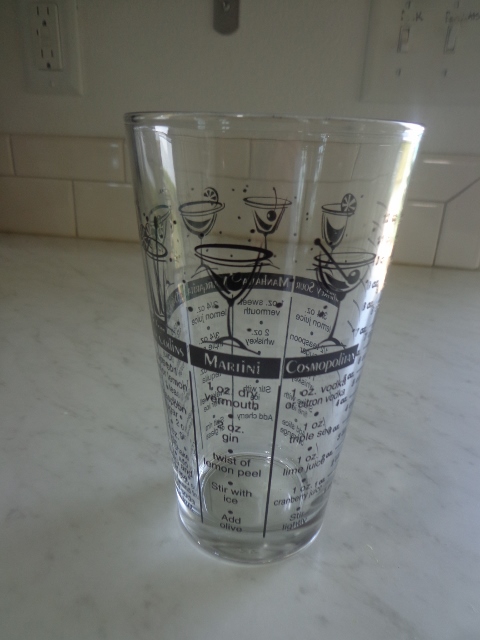
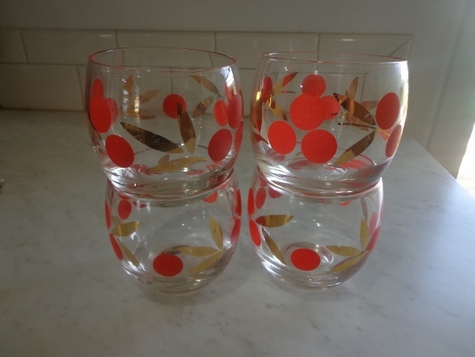
I do love these glasses, what are they for? Brandy old fashions or something? Like I said, I'm clueless.
  
Again, I love the gold on them though.


Picture
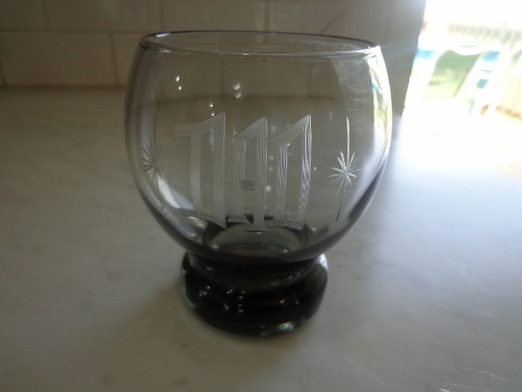
And lastly, we have Tim's favorite glass to drink out of every day, 
whether it's water, 
orange juice 
or wine.

Our daughter and son-in-law found this at a second hand shop and bought if for Tim a few years ago.

Oh heck those kids, 
we'll probably KEEP THEM!
Picture


Okay Guys,
Gotta go, 
it's getting late and Tim needs his beauty sleep...bahahahahaha! Yeah. More like A-N-G-I-E.

Anyhoo, 
Have a wonderful week 
and 
we'll talk at ya soon!!!


Dippity Do Da

8/21/2015

 
Picture
www.barefootcontessa.com Photo by Quentin Bacon

I think we can all agree that
 
Ina Garten 
(Barefoot Contessa)
 
is a 
food 
rock star.


This is Ina's Herb Dip. It is awesomely fresh 
and addicting!
Picture


I served a huge bowl of this dip with some fresh vegetables for a luncheon last week.
Picture
Quite frankly, I have no idea why I put ALL TWO CUPS of this delicious dip in a large bowl and plopped it down like that on the platter for just a few people. Me not brightest crayon in box. 


To print the recipe, here's the direct link to go to Ina's Herb Dip page on the Food Network site. Just click HERE.

Herb Dip
Ina Garten
Straight outta www.foodnetwork.com 

Ingredients
8 ounces cream cheese, at room temperature
1/2 cup sour cream
1/2 cup mayonnaise
4 scallions, white and green parts, minced
2 tablespoons fresh parsley leaves, minced
1 tablespoon fresh dill, minced
1 teaspoon kosher salt
3/4 teaspoon freshly ground black pepper


Directions
Place the cream cheese, sour cream, mayonnaise, scallions, parsley, dill, salt, and pepper in the bowl of an electric mixer fitted with the paddle attachment and blend. Serve at room temperature.


Here's the fixins for this 
super duper easy Herb Dip! 
The fresh parsley, dill and scallions is what makes this recipe!
Picture
See! Not many ingredients! Very quick and do-able!


Picture
And it calls for beautiful 
fresh dill.


Mmmm, 

love the smell of 
fresh dill!


I'll bet you do too!


Now this recipe is going to go quick, 
so start by chopping up the scallions, dill and Italian parsley.
Picture


Picture


Throw the 
cream cheese, 
sour cream and mayonnaise in the mixing bowl, 


along with those yummy fresh herbs!


Mix away!
Picture


And you're done! 
Now how easy is that!!!
Isn't that what Ina always says???
Picture


Serve the dip with fresh vegetables.
Picture

This dip is fresh and herby and addictive! 
I was shocked at how easy and how delicious this dip is!


Okay, that's all I have! 
To print off this Herb Dip recipe, just click HERE to go to Ina's page and 
click on print. 


Oh quickly, I want to show you a picture of this delicious Garlic Cheddar Bread I picked up for the luncheon at the local Amish bakery that day....delicious!
Picture


I wish I had some of this bread and that big platter full of veggies and dip right about now. 
It'd be a perfect lunch!


Okay kiddos, have a great weekend. 
I think I'll be talking about elegant potato cups next time I post.

Try to contain your excitement :)

Take care and we'll talk at ya soon!!


I'm Not A Sewer or Quilter But I Am Mesmerized By Quilt Shops and This is a Super Cool and Cute One in Cedarburg, Wisconsin.

8/19/2015

 
Tucked away off Greenbay Rd,
outside the old German destination town of Cedarburg, Wisconsin, 
is an adorable quilt shop.
Picture


Ye Olde Schoolhouse.  
Blink and you'll miss it!
Picture


Once you pull up in the driveway,
you can clearly see it is a former old time schoolhouse. 

The schoolhouse was in operation from 1887 - 1958!
Picture


This was a little vignette outside the front entry door. 
I just KNEW I was going to love this place!!
Picture


As you walk in,

the colors and warmth and textures welcomes everyone.
Picture


Every nook and cranny of the old schoolhouse is used for the passion of quilting.
Picture


Helloo pretty pastel-y bolts of fabric!
Picture
Um, jus' a minute here....
Disclaimer: My name is Angie. I am the daughter of a phenomenal seamstress and quilter. I have no idea how to darn a sock (I don't even know what that means) much less quilt a quilt or...oh, I'll just be real....I don't understand bobbins and how to thread a sewing machine. It's too complicated and frankly, scary stuff.  If I use the wrong language when describing these pictures, please forgive me and blame my mom who should have known better than to raise five kids who don't know squat about sewing other than fabric is pretty and feels good.

Second Disclaimer: I may be up for adoption if my Ma reads this. I'm pretty certain the adoption fee will be waived, in fact, Ima thinkin' Ma will PAY you.  


Anyhoo, there's baskets and baskets of sewing items.
What is this???

I have no idea. That's why I called it sewing items.

Is it a notion?

I like it though, it's pretty and texture-y.


I wanted to jump into it like those bouncy ball pits and roll around.
Picture


Picture
Ohhhh look at the vintage baskets holding other things...

Kits! 


Bet they're called kits!


Picture
And look at this cute small old red painted cupboard!

Angie want-y!!


There was a room full of just 
books and booklets.
Picture


Picture


A cute room 
with spools or skeins of thread.


(Remember, I do not know sewing terminology) :)


The old schoolhouse Girls Bathroom 
was still in place....
Picture
Picture


As were the 
the stalls. 


And look at that! 

A cute quilt thrown over the wall!
Picture


Tim and I eventually made our way 
down 
the 
stairs 
to 
the basement...
Picture


And oh my goodness gracious, it was a mother lode  of all things quilting!!!
Picture


Rows and rows and rows of beautiful fabric...
Picture


Picture


Picture
Many of the fabric bolts 
were nestled on custom made 
bolt ends,
 built onto benches that were left in the schoolhouse building. 


These book cases are original to the schoolhouse. 
Soooo cool!!
Picture


Yards of fabric everywhere!!
Picture


Look up above the bookcases and there are adorable vintage displays like this one...
Picture


And this vintage stereo
was playing the music loud and clear for shoppers...
Picture


I'm a sucker for anything bright and shiny and I loved 
this embroidery thread display.
Picture


Care
 

for any buttons?
Picture


Picture
 How about something sew-y 
from this cute popcorn bowl?


Okay, is this the Flying Geese pattern?

I think it's the Flying Geese pattern but I am tripped up by the 

vine and flowers...


Those triangles are Flying Geese, 
I'd almost bet a cheesecake on it.
Picture


A big part of the success of this super awesome quilt shop is the classes and quilt gatherings they host every week in the
 lower level classroom.
Picture


We met the owner and one of the ladies who works there and those are happy people, lovin' what they're doing, let me tell ya!!!! This is a happy place!
Picture


As evidenced by the adorable painted chairs around the large work table...
Picture
Picture


And 
just randomly laying around was this cute needlepoint heart.
Picture


And talk about hearts....be still my heart!!!!
LOOK AT THIS DOOR WITH THE ORIGINAL GLASS, WOULD YOU!!!
Picture
Picture

*
L
*
O
*
V
*
E
*


Okay. I admit I took a little peeky weeky down another set of stairs that led to someone's office. 
But I didn't go DOWN them! Swear!
Cause that would have been rude. And trespassing. Even though I WANTED to. 
Picture
That looks like such a cool office though, doesn't it??!!


Okay, last thing Ima show you is not related to sewing.

It was in the Quilt Shop kitchen.
...
...
...
...
...


Picture
A VINTAGE HARVEST GOLD SIX BURNER  
DOUBLE OVEN RANGE!!!!!


AND IT STILL WORKED PERFECTLY!!!!!
Picture
Oh, who was beside herself?? 


Who wanted to take that range home???

Who?
Who?

I LOVED THAT STOVE!

Ultimately it occurred to me, if I did have that range in my own kitchen, 
every one who enters my house would be so jealous, they wouldn't ever talk to me again, thinking I was a total showboat.

So I figured it was just less drama not to consider asking the ladies if I could buy it.


Okay, I'll go ahead and close for now but I would like to share a quilt from back in February that my Ma was working on. 
I begged her to give me this quilt. I NEEDED this quilt. Look at those colors and textures, it's like a watercolor painting. Mom said she would give it to me. 
Picture
I would love to share a picture of this awesome perfect quilt displayed on my guest bed, but I can't. 


Cause I don't have it. 


Yet. 


MA!!!!!!!! 

QUILT!!!!!!!!


Okay, so another riveting  post wraps up. 
Now I want y'all to promise me you won't go to that cute quilt shop up in Cedarburg, Wisconsin and buy that AWESOME HARVEST GOLD RANGE out from under me.
Promise now. 
I KNOW you want it.


:)
Talk at ya soon!!!


I Can't Believe How Quick and Easy It Is To Make 4 - Ingredient Homemade Whole Wheat Tortillas! Also, I Am Spartacus.

8/17/2015

 
Yes. 
I made these whole wheat tortillas today.
By hand!!! I hand made them!
I have to do EVERYTHING around here!


Picture


I wasn't planning on making homemade tortillas today, at all.

I woke up early and for some odd reason,
 felt very productive.
I had no idea that was possible, actually.


Picture


Then I threw 
one of my neighbor's organic, free-range chickens in the crockpot, 
using this recipe that is no-fail fantabulous.


Picture
I made sure to make a warm mug of lemon water to start the day.

I do more than lemon though. 

I also add:
  • Honey for allergies
  • Cayenne for metabolism/digestion
  • Turmeric for inflammation

Picture
I had washed the dishes and 
cleaned the kitchen the. 
night. 
before.

I KNOW!! Can you believe it??? So I didn't get dragged down with that.

I also saw it was beginning to get light outside...


So I ran out to water the flowers. 


Picture


It occurred to me I apparently  
over-fertilized this particular basket last week.


Not cool, 


I know.


Picture


Now the garden hose doesn't extend all the way out to the flower pot by the road....

Man, those flowers grow TALL!!


So I always have to grab the watering can that sits by the garden shed...


Anyhoo, I think I've been doing a good job keeping 
these flowers in this planter watered...
Picture
Picture
Sometimes 
I'm successful.


Sometimes I'm not.

Note to self: 
Be productive tomorrow and take some soap and water to that sign frame.

Additional Note to Self: 
Do not wear pajamas while doing this.


A
nd I hightail it out to the sign, all the while praying nobody drives by and sees me in my pajamas.


Know what else is tall?   The corn! 
You just can't beat the beauty of Iowa in summer in the early morn hours!
Picture
If *I* can do it, anyone can do it! 
Seriously!! A monkey, a 2 year old, the neighbor's 
Border Collie that stops by occasionally...ANYBODY!

Picture
And it's only 
4 ingredients! 
4!

Okay, I just noticed I only have 3 ingredients here. 
For Pete's sake, someone just commit me already, please.


The 4th ingredient is olive oil, yeesh.


Okay, let's get back to today's topic, 
I MADE HOMEMADE TORTILLAS AND IT WAS SO EASY!
Only 4 ingredients!!


Picture


This recipe is from the My Fitness Pal website.
Click HERE to to go to that website to print off recipe.
Picture
I use white whole wheat flour. 


There are several brands, but I do like this one 
the best.


4-Ingredient Whole Wheat Tortillas
Ingredients
  • 2 cups White Whole Wheat Flour
  • 3 tablespoons Extra Virgin Olive Oil
  • 3/4 teaspoon Salt
  • 2/3 cup warm Water
Directions
In a bowl, mix together the flour, oil and salt. Slowly add the warm water while stirring until a rough dough comes together. Add a little extra water if needed. Turn the dough onto the counter and knead for about two minutes. Return to bowl and let rest for 20 minutes.

Divide dough into 8 equal balls. Using a rolling pin, roll each ball into a circle. You’ll want them to be pretty thin.

Heat a pan over medium high heat and grease very lightly. Drop one tortilla into the pan and let cook until bubbles form, about 1 minute. Flip over and cook another minute, pressing down with a spatula if needed. Repeat with remaining dough.

Use immediately, or store in an airtight container and either refrigerate or freeze. Warm just before serving to soften.


Picture
This is how easy 
this is.


Throw all four ingredients into the bowl.


Picture


Mix 
it 
up!

Picture
Throw the dough ball onto your counter.


Now really, 
how easy can this be???


Picture
Knead that sucker 
for two minutes 
or so.


Picture
This is the easiest part. 

Let it rest for 20 minutes.


Picture


This is easy too!


Form 8 golf ball size balls!


Picture
Roll each ball into a circle.

I did NOT use flour, it just rolls out very nicely like this!

This was my very first one. Not too bad, huh!

I about crapped, 
quite frankly,
 at how easy this was!

Picture
And this was my second one, 


even better and 
more round!!


Picture
I rolled them out about this thin. 


Some I even rolled thinner.

Picture
So I threw my first one in the cast iron skillet. 


 I had the skillet on Medium heat.


I waited till it bubbled and browned a bit...
Picture

...and then I flipped the tortilla over for about the same amount 

of time, 


a minute or two.

Picture


I - AM - SPARTACUS!!!!!

Picture
AMPAS (Academy of Motion Picture Arts and Sciences)


Picture


Ever see the 1960 movie Spartacus 
with 
Kirk Douglas, 
Laurence Olivier 
and 
Tony Curtis?


Well, just in case you haven't seen the movie, 
here's the movie trailer. 
1960 style.


Prepare for cheesetastic!


PictureAMPAS

This is from the set of Spartacus. 


That be a cool looking Kirk Douglas 
and 
a super young 
Tony Curtis. 


Wow!


Know what else is wow???
 I made TWO EXCELLENT TORTILLAS!!! 
IN A ROW!!
Picture
I WAS GETTING SO EXCITED BY THIS TIME, 


I WAS WHOPPIN' IT UP, 
although no one was around to enjoy THAT classiness,


AND I WAS DANCIN' AND ACTIN' LIKE A FOOL AND
ALL COOL...


And then reality always bites me in the
...in the
in the tortilla.
Picture


Whatev tortilla #3, 
I will overcome!!!


Picture


Bingo.


Picture
So I kept the tortillas wrapped up in a kitchen towel to keep them warm and soft.

Then I started putting together a simple taco just to see how these tortillas really are....

We have roast chicken and tomatoes here...


Picture
Let's add 
 queso fresco cheese 
and 
cilantro...


Okay, gearing up. This is the key moment. 

How are these tortillas...


Picture
The answer be awesome!

The tortillas were
  • soft 
  • easy
  • quick
  • 4 ingredients
  • no additives!


So if you want to print off this easy recipe, just scroll up and click on any My Fitness Pal link or just click HERE.


So anyway, blogging about these tortillas made me think of this vintage advertisement I have hanging out on my kitchen shelf for Coronado Ranges...
Picture


Coronado Range 
featuring the 
"CONSTANT CLEAN OVEN!" 
Man, I NEED that!
Picture


It's like Cathy is talking directly to me, 
whispering, 
"You will never be complete without a constant clean oven, Angie. 
Your oven will always be dirty if you do not buy Coronado." 
Picture


Cathy's right, you know. 
I just opened up my constant dirty oven and this is how it is looking. 
Aaaand of course there's a leftover pan with food hiding in there. 
Picture
I AM shameless. 
And prideless.


Picture


Cathy thinks so too.


CATHY CAN STUFF IT!!!!


Anyhow....the chicken I threw in the crockpot this morning, remember? 
I made broth with it after I had deboned the chicken. 
Click HERE for the recipe I use for chicken broth, 
I didn't cook it overnight, I cooked it during the day. 
Picture


And here is the yummy stock 
I procured from the crockpot fixins!


So after taking an excruciatingly long time to tell you about my simple 
4 - Ingredient Whole Wheat Tortillas that I made, 
I will sign off for now.


When I come back, I will be sharing an elegant twice baked potato cup recipe and a dill dip recipe that you will send me a thank you note and five thousand dollars in appreciation.


What?
 
It could happen!

It's THAT good!
:)


Okay, thanks for checking in y'all, 
have a great week and 
we'll talk at ya soon!

Chocolate Chips and Butterscotch Morsels AND Pretzels in a Cookie??? Yup, So Good You Should Eat It For Breakfast.

8/15/2015

 
Butterscotch Pretzel Chocolate Chip Cookies!
So good, you'll want to eat them the next morning for breakfast!
Picture


I'm pretty sure there's some breakfast-y kinds of ingredients here...
Picture
See! I told ya!! There's eggs in these cookies. 
That makes them suitable for breakfast! 


Now this recipe is from 
Sally's Baking Addiction website.
Check her website out, there's yummy recipes there!
Remember, to print out this recipe, just click HERE to go to Sally's Baking Addiction website and you can print off the recipe there.


Now let's not waste any time, 
chop up those pretzels...
Butterscotch Pretzel Chocolate Chip Cookies
Straight outta www.sallysbakingaddiction.com
Makes 3 dozen cookies. Cookies stay soft and fresh at room temperature for up to 7 days. Cookie dough balls may be frozen up to three months and baked at a later time.

Ingredients:
  • 2 cups + 2 tablespoons all-purpose flour
  • 1/2 teaspoons baking soda
  • 3/4 cup (1.5 sticks) salted butter, softened
  • 1 cup packed light brown sugar
  • 1/2 cup sugar
  • 1 egg, at room temperature
  • 1 egg yolk, at room temperature
  • 2 teaspoons vanilla extract
  • 1/2 cup chopped pretzels
  • 1/2 cup butterscotch chips
  • 1/2 cup semi-sweet chocolate chips

Directions:

Preheat oven to 325F degrees.
Mix the flour and baking soda in a bowl and set aside. With an electric mixer or stand mixer with a paddle attachment, cream the butter and sugars together. Add the egg, egg yolk, and vanilla and mix well. Gradually add the flour mixture and stir until a dough forms (may take a couple minutes of stirring). Fold in the pretzels, butterscotch chips, and chocolate chips. Do not overmix the dough at any point in this process.

Chill dough for at least 30 minutes (or up to 5 days) in the refrigerator. Drop by tablespoonfuls onto ungreased baking sheet. Press a few more pretzels (or butterscotch chips or chocolate chips) onto the tops for decoration. Bake for 8-10 minutes or until edges are slightly browned. The centers should appear very soft and puffy. Let cool completely and enjoy!

Sally's Tip: *Make sure to keep dough cold at all times while the batches are baking. I kept my dough in the refrigerator in between batches.


Okay, I'm trying to think why I would showcase such a super exciting picture as the flour and baking soda here. 
Hmmmm?????????
T'ant pretty to be my brain.
Picture


Anyhoo, moving along.....
Picture

And apparently moving along rather quickly 
because this was the next picture on my camera...everything all mixed in together, the wet and dry ingredients. 


So I actually doubled the recipe. 


The two batters look good enough to eat, don't they!
Picture


And another gratuitous batter picture just to 
whet your appetite. 
By the way, I did eat some of this batter, MOM, and I did not take ill or die of botulism or potato famine disease or whatever it was you always scared us with about raw eggs and cookie batter.
This bowl has just the chocolate chips and the pretzels added in. 
This bowl has the chocolate chips. pretzels AND the butterscotch morsels!


So anyhoo, I baked these babies at 325 degrees, 
according to the directions. 
They took a bit longer than the 8-10 minutes. More like 14 minutes, but I made sure NOT to overcook them. 
Picture


OOPS! I forgot! I was supposed to add extra chips and pretzels on top just before baking so that's what I did with this next batch, like this.
Picture


Picture


They came out of the oven looking yummy.


And the cookies came out of the oven looking just a little bit funner like here!
Picture


Picture


Now look how cute these baked goodies are with that extra topping.


Here's the difference between the batch that had extra topping put on and the batch that didn't. 
Picture
This cookie recipe is perfection.

sweet chocolatey
sweet buttercotchy
and salty pretzely


The perfect combination!

The outside is slightly crispy... 

Both tasted great although you get a little bit more crunchy saltiness with the extra pretzel topping of course.


And the inside is soft and gooey!
Picture


Well, I sure hope you try out this recipe sometime! 
Oh! They freeze wonderfully, too!
To print off recipe, just scroll up and click on any of the Sally's Baking Addiction links!


I promise the cookies will taste better than my plant is looking out on the back deck today. 
This plant used to be gorgeous, now it's barely getting by.
Picture


This pot of succulents has done great though! 
I don't even know what succulents are, but it looks cool.
Picture
And what is up with the geraniums this year? 


Most of summer, mine have been yellowish with few blooms.
And the blooms that are there, 
are small.

Picture


And lastly, I have no idea how the last remnant of this scrawny tabletop plant got removed and tossed to the side overnight. 
Howwwwwwww??? Who does that???
Picture


Hmmmm.
Picture


Okay kiddos, tis all I gots for today!! 
Gotta get to the grocery store for some lasagna ingredients!

Stay cool, 


it's a hot one out there this weekend, 

and we'll talk at ya soon!!!


Cool Cars in the Drive and a Cool, Colorful Mexican Citrus Salad with Avocado in the Kitchen

8/11/2015

 
Two separate cool customers stopped by the last couple weeks to show Tim their cool vintage cars...

And just like
Tim LOVES vintage muscle cars (as do I)...I also love this colorful Mexican Citrus Salad with Avocado.
Picture
But we'll get to this colorful citrus salad after looking at some more pictures of these two cars.


Now this is Doug1's car...a
 1971 Oldsmobile Cutlass
Picture


Picture


Picture


This has an Oldsmobile V8 engine...
Picture


Picture


Of course 

Tim had to check the engine out.


Pretty dang awesome is what Doug1's car is!!!
Picture


Now we move along to Doug2's car...a 
1967 Pontiac Firebird

Picture


Picture


Picture


This Firebird has a Pontiac V8 engine in it...
Picture


Picture


Doug2's wife said he bought the car for her but so far she hasn't been able to drive it yet which made me laugh to no end :):)
Picture


In between all the cool vintage cars, I snapped a pic of another very vintage vehicle that travels by almost daily...

Picture


And of another one...
Tim's 1980 Malibu.


Oh look, it's Tim and our 3 1/2 year old grandson, 
Little Boy Blue, driving around the open field...
Picture
Picture


Picture


Little Boy Blue 
gets to sit on the go-kart sometimes too.


But now I feel we must get back to this Mexican Citrus Salad with Avocado...this salad is WONDERFUL!!!!
Picture
Mexican Citrus Salad with Avocado
Straight outta www.midwestliving.com
Ingredients
  • 1/4 cup fresh lime juice
  • 1/4 cup fresh orange juice
  • 3 tablespoons vegetable oil
  • 1 tablespoon finely snipped flat-leaf Italian parsley
  • 1 tablespoon minced shallot
  • 1 tablespoon honey
  • Salt 
  • Ground black pepper
  • 1 cup bite-size strips peeled jicama
  • 1 medium grapefruit, peeled and sectioned*
  • 1 medium orange, peeled and sectioned*
  • 1/2 cup thinly sliced red onion
  • 1 avocado, halved, seeded and cut up
  • 3 cups torn Boston or bibb lettuce, torn into bite-sized pieces (3 cups)
  • 2 cups chopped romaine lettuce
  • 1/2 cup pumpkin seeds (pepitas), toasted 
  • 1/2 cup crumbled queso fresco, soft goat cheese (chevre) or feta cheese
Directions
  1. In a medium bowl, whisk together the lime and orange juice, oil, parsley, shallot and honey. Season with salt and pepper. Add the jicama, grapefruit, orange, red onion and avocado; toss gently to combine.
  2. Combine the Boston and romaine lettuce in a serving bowl or on a platter. Spoon the dressed ingredients over the lettuce. Top with pumpkin seeds and queso fresco.

Here's the recipe.....just click HERE to go directly to Midwest Living and print off this amazing salad!
Picture


This salad (even without the dressing) is citrusy and bright and delicious!


Picture
There's 
Bibb lettuce and Romaine and grapefruit and orange pieces. 

There's queso fresco cheese and avocado and 
red onion and of course jicama.
And amazing, 
just amazing dressing to go along with this vibrant salad.


We kept the salad dressing on the side.

This dressing is FABULOUS by the way!!!!!!!!
lime juice 
orange juice 
olive oil 
parsley 
shallot  
honey
salt and pepper 
Picture
Picturecookinglight.com


And don't forget to use Jicama (found in the produce section), looks like a round turnip with brown skin.

While whisking the ingredients to the salad dressing, you will keep repeating to yourself a line from Jerry McGuire. 
NO, 
NOT "Show me the money!" 

The other line....."You had me at hello."


Jicama is like a Mexican water Chestnut or apple....it is key to this lovely, light, refreshing salad! 
Provides crunch and an interesting textured flavor.
Picture
Again, click HERE to go directly to 
Midwest Living magazine and print off this awesome salad.
Picture


Okay, so in closing, it looks like Tim and Little Boy Blue 
are going fast in this go-kart but they are not. 
(I had used the zoom lens on my camera to capture the joy in grandson and grandpa's faces, capturing a a fun moment in time for both of them.)
I think our one and only grandchild is so darn adorable, 
I could eat him up in one bite!


That's probably why he spends so much more time with his Grandpa than with me, he doesn't want to get eaten all up.


He'd rather be pulling out 28 year old 4-wheelers from the garage with his Grandpa and seeing if they run after 
10 years in storage.
Picture


Picture
Picture
Picture
Picture


I guess the answer to the question of if the 
4-wheeler still runs after 10 years, be yes that day :)
Picture


Okay kiddos, tis all I got for today!! 
I will say though, the next recipe Ima share is a Butterscotch, Chocolate Chip, Pretzel cookie!
Sweet AND salty...the best life has to offer :)


Thanks for checking in, guys!

Hope everyone has a great Monday!!! 
Have fun (but not too much fun that family members then have to bond you out of the 
County Hilton :) 
and we'll talk at ya soon!!!
Picture

Pretty Pictures and a Super Fantastic Pasta with Kale Pesto and Roasted Butternut Squash!

8/6/2015

 
Picture
Hi Guys! 
THE FOLLOWING PICTURES MAKE ME HAPPY AND I JUST WANTED TO SHARE THEM. 


Picture
This is a picture of Tim's Grandmother's kitchen window in Albuquerque about 30 years ago, 
one of my favorite pictures ever. 
Marguerite would change the glass out seasonally.


Can someone come to my house this weekend and lay this exact sidewalk by the summer kitchen, please? Hello? Bueller? Bueller?
Picture
artpeople.net
Picture
Picture
mariakillam.com...check her blog out, she's a fantastic designer and colour expert.


This entryway intrigues me. Even the carpet,
 but especially that railing. 
I want to tour the rest of the house.


Maria Killam is a designer and colour expert. 
This is her living room. Talk about put together!


On the other hand, this entryway intrigues me too. 
I'm nosy. 
I want to know what's upstairs and what's on the main level here.
Picture


I saved this picture because I think the walkway might be realistically doable for me down the road.
Picture
mariakillam.com
Picture


This is gazpacho. Doesn't look like any gazpacho I've ever seen. Yes please, I'll take two bowls, er I mean glasses.

Picture


And when I get tired of that porch, I will retire to this other porch, also attached to my imaginary dual-porched house.


I'll eat that gazpacho out here on my pretend porch, by the sea.
Something is driving me crazy though....um, 
WHO has floors that clean?? In a kitchen??? Who???
Picture


And I will wash up those gazpacho pedestal glasses in this here kitchen in that imaginary house by the sea.


Okay, now we get to a delightful dish that makes me super happy too. 
This light refreshing dish is full of flavor and just a delight to eat. 
Pasta with Kale Pesto and 
Roasted Butternut Squash.
Picture
Lottery Hill Farm in Vermont.
Picture


Picture
This dish is one of the top five things I've made and devoured!!
In fact I made it for breakfast the other day, I was craving it so much.


So this dish is from 
Melissa Clark with the 
New York Times!


And here's the fixins for this 
refreshing pasta dish!
Picture
Also, I used a whole wheat, 
locally made pasta.

Oh gosh, I think this style is called corkscrew or twizzler or something...I'll remember before I'm done with this post. 

Rotini, maybe?? Oh heck, I'll just google...
Okay, just googled, 
it's either fusili or rotini.  
Anyhoo, use whatever you have in the pantry.


Here's the recipe....Just click HERE to go directly to the New York Times recipe.
Pasta With Kale Pesto and Roasted Butternut Squash
 MELISSA CLARK...straight outta cooking.nyt.com
  • Time 45 minutes
  • Yield 2 to 3 serving
Here is a one-pot meal designed explicitly for the hungriness of a long-distance runner, with garlicky kale pesto and sweet roasted butternut squash. Making the pesto with kale instead of basil gives it a structure the basil-rich original lacks, and it interacts beautifully with the crisp-and-soft smoothness of the roasted squash. A terrific dish.
 
INGREDIENTS
  • 1 ½ pounds butternut squash
  • ½ cup extra virgin olive oil, more for drizzling
  • ¾ teaspoon kosher salt, more for squash
  •  Freshly ground black pepper
  • 1 small bunch (about 1/2 pound)lacinato kale, center ribs removed
  • 8 ounces pasta (penne rigate works well)
  • ⅓ cup toasted pine nuts
  • 2 large garlic cloves, roughly chopped
  •  Finely grated zest of 1 lemon
  •  Freshly squeezed lemon juice, to taste
  •  Grated Parmesan cheese, for serving

        PREPARATION
  1. Preheat oven to 400 degrees. Use a vegetable peeler to peel squash, then halve it lengthwise and scoop out seeds. Dice squash flesh into 1-inch pieces, place on a baking sheet, and toss with olive oil and season generously with salt and pepper. Spread pieces into an even layer, making sure there is space between them. Roast, stirring squash pieces once or twice, until golden brown and tender, about 30 minutes.
  2. Meanwhile, bring a large pot of salted water to a boil; have ready a bowl of ice water. Drop kale into boiling water and cook for 45 seconds. Use tongs or slotted spoon to transfer kale to ice water. Bring water in pot back to a boil, adding more if necessary so there is enough to cook pasta.
  3. Drain kale well, then wrap tightly in a dry kitchen towel and squeeze thoroughly to remove any excess moisture. Roughly chop leaves. When water in pot comes back to a boil, cook pasta according to package directions.
  4. In a food processor, pulse together kale, nuts, garlic, salt and lemon zest until mixture is smooth and salt has dissolved. With motor running, slowly drizzle in the oil until fully incorporated. Taste and add more salt dissolved in a little lemon juice, if necessary.
  5. Drain pasta, reserving a little cooking water. Toss pasta with kale pesto and some pasta cooking water if necessary to help it coat pasta. Add cheese, lemon juice and salt to taste. Serve topped with squash and more cheese.


So we'll start by toasting the pine nuts in the oven for 
10 minutes at 300 degrees.


Angie's Public Service Announcement: 
Do not, 
I repeat 
do not 
have heart palpitations when you see how much pine nuts are at the grocery. 
Just
#1 Breathe 
#2 Cover your eyes with your hands and 
#3 Buy them, they are essential here... 


Picture
Just wanted to mention that I bought Lacinato kale, 
or what is commonly referred to as 
Dinosaur kale, 
instead of the more traditional curly kale.


Either one works fine, for sure!!


First, prep all your ingredients. 
Cut, chop, toast, grate and shred.
Picture


Olive oil up that yummy cut butternut squash, and salt and pepper them and bake 
for 30 or so minutes....


Picture
Now get your boiling water in a pan ready for the kale 


and then have a bowl with Ice cubes and water beside....


Throw that kale into the boiling water for
 45 seconds or so...
Picture
Picture
...And then throw the kale into a bowl of ice water to stop the cooking...


it should look a gorgeous bright green!


Picture
Drain the kale on a paper towel and squeeze dry.


Throw the pasta in the boiling, salted water...
Picture


Now chock the kale, toasted pine nuts, the garlic, and lemon peel in the food processor and pulse away!


Picture


Now drain your pasta...


you're getting close!!!

Picture
It should smell heavenly, 
just heavenly, 


and look like this.


Picture


Toss 
the pasta with the kale pesto....


Add a tiny bit of pasta liquid, if needed, to keep things nice and coated...
Picture


Looking good, yes??  
Also, you can not even imagine how wonderful this smells with the toasted pine nuts and lemon peel, garlic and kale....fantastic!!
Picture


Oh my goodness gracious, 
now add the roasted butternut squash...
Picture


Shred some of that fresh Parmesan on top....
Picture


I can still smell the lemony pesto 
with the sweet butternut squash 
and the saltiness of the Parmesan.
Picture


Like I said earlier, I made this twice in one week cause it was so light, refreshing, delicious, a perfect combo of everything summery.
Picture
OH! You can eat this warm or eat it for 
lunch the next day cold.
 Either way it's terrific and I really hope you try this recipe out sometime!!!


Okay, so closing out, I would like to share a couple of other pictures that make me happy (none of the pictures showcase potato chips or cheesecake though, that's for another day :)


So the weather last week was 
a-changin' to the south there....
Picture


Tim was sitting on the deck...
Picture

rather 
enjoying himself with a
 cigar, 

a glass of wine,

and the Bible, 


his usual evening 
accouterments. 


Picture
I looked over at the sitting area off the deck, under the tree,

 and stated how peaceful it looked that night,

 
with a newly mowed lawn.
Picture


Picture

So Tim decided that would be a good vantage point to watch the storms in the southern skies.


At least one cat thought so too, 


and joined us as well.
Picture


And the sky that night was quite lovely to see, when you're far, far away...
Picture


Okay, so that's all I have for today! 
I really do hope y'all try out the 
Pasta and Kale Pesto recipe sometime soon though!!


So have a good rest of the week kiddos,
 stay cool, 
and we'll talk at ya soon!!!


Tim Said This Post Definitely Did Not Make Him Hungry...Uh yeahhhhhhh.

8/2/2015

 
DIG IN!!!!!
Picture
What, you say??
You say you don't know what-it-is?  
Why, it's burnt chicken wings, Silly.
Picture
Even though olive oil does NOT have a high smoke point, 
I thought I would be that one super duper, special, awesome person who would prove all the cookbooks wrong and pan-fry chicken wings in olive oil without burning them. 


Picture


I was wrong.

Soooo, was it the cook or the recipe?


Picture
   Um, it was the cook.


Okay, next up:
A Baked Italian Spaghetti Squash recipe...
Picture


Picture


I have made this twice...


Picture
I made it exactly according to directions.


Bland.


Very bland.


Was it the cook or recipe???


Picture
    
It was the recipe.


NEXT..............
Okay, we have these simple, easy, no bake chocolate crisps...
Picture


They look yummy, 


don't they??


And with just a few ingredients, how could you go wrong?
Picture


Picture
Wayyyyy too sweet!!! 


Nothing to balance out the sweetness. Wow. 


Had to throw them all away.


And frankly, I can and will eat anything, but these made me pucker.


Verdict...cook or recipe????

Picture


Recipe.


Moving along....


Picture
I have no idea 
what dish this is from July 12 of this year.


No idea. 
No notes, can't find the recipe.

I just know it had no flavor and was 
unappetizing.


Cook or recipe????
Picture
Recipe  (I think). 
Heck, I can't remember what I ate for breakfast much less a meal I made three weeks ago. Still, I'm going with recipe.


Okay, lets move along to this 
Mexican Green Chile Veggie Burger from the other night...
Picture

Maybe I'll put that veggie burger on a bun with cilantro, salsa and advocado and see if it's any better....


Picture


Answer be nope.

Cook or recipe???
Picture
In all honesty, I think it was the cook. 
I should have used avocado oil instead of olive oil for high heat cooking. Sighhhh.


Now we come to a Cuban sandwich....
Picture
Fact #1...A Cuban Sandwich has the following on it:
  • Pork
  • Ham
  • Yellow mustard
  • Dill pickles
  • Swiss Cheese


DO NOT.............I REPEAT...........DO NOT:
1. Confuse yellow mustard with spicy brown mustard
2. Confuse dill pickles with bread and butter pickles
3. Confuse Swiss cheese with any old cheese you have laying around in the refrigerator.


So who's fault is this craptastic attempt at a 
Cuban sandwich??? I mean, it was baaaaaad.


Picture


Oh heck yeah, The Cook all the way!!!
I'm not the brightest crayon in the recipe box. :(:( 


And now on to one of my biggest failures....
Picture


Hello, 
everything that is needed for stir fry... 


a Chicken Garlicky, Vegetable, 
Tasty, Stir Fry.


Picture
Except. 
No flavor.

WHERE IS THE FLAVOR???

WHERE???
BOR-ING!

I want flavor.


Verdict???
Picture
Now this is recipe all the way. 
I made this exactly to the T, to the T!  
I blame the addition of the tasteless garlic sauce.


Okay, let's move along to a 

Pork Roast and 
a Parsnip and Potato Gratin...
Picture
M'kay.....
Pork Roast: No flavor but I'm not a huge pork person.
Parsnip and Potato Gratin: Too onioney, definitely not a keeper.


Sighhhhhhhhhhh. I wanted it to be good, I reeeeeeaaaallly did!


So who was to blame??...The cook or the recipe???
Picture


The jury is still deliberating.


For my next trick, I tried making cornbread 
for the 1000th time. 
Normal ingredients PLUS the addition of chives and white cheddar this time. 
Sounds legit. I just know I will be successful this time.
Picture


I mixed everything up according to directions and cooked it in a cast iron skillet and did everything right...
Except it had no taste. Except flour. 
Is flour even a flavor?


Did I ever tell you about the time I ate flour as a kid? 
Actually, I ate flour more than once. Apparently, I was holding out hope that the next time there would be flavor. I was wrong each time.


Kind of like me and cornbread. Cornbread is my old flour. 


Picture
Moving along,
 let's discuss this picture.
 
I had deleted the recipe so I can't remember what this dish was other than not very good.

I think we all can agree there is quite a bit of work still needed on improving my food photos though. 


Such as 
the next picture...


Picture
I'm assuming NOT taking a picture of a chicken's butt was probably learned in Food Photography 101. 


I think I forgot to take that class.
I was too busy eating flour and being hopeful.


The recipe was ultimate delish though. It really was!


And lastly we come to a really big disappointment. 
This was all due to the recipe, not the cook :)
I even went out and bought a $12 pretty green bundt pan.


Picture


This was supposed to be a delicious Kentucky Butter Cake....
Picture


And these were the fixins for this cake...


Of course I had to do some self-talk since 
I AM NOT a baker, am terrible at it, and despise it!
Picture


Picture
The cake is looking great in the oven, 

yum yum, 

I can barely wait for it to be ready....


So I drizzle the melted butter over it, fresh out of the oven...
Picture


 I invert it over on a pretty tray and sprinkle powdered sugar over the top.
Picture


I was so excited, 
couldn't wait to try this dee-licious moist cake...
How could one go wrong???!!!


So I grabbed a piece and
and
.....
and
.....
Picture
it tasted like a big ol' stick of butter.

And flour.

Flavorless butter 
and 
flour.


How can this...


Picture
...turn into such blah?


Was it the cook or the recipe?

Picture
I'm going with recipe on this one, folks.


However,
I am blaming The Cook on the following disasters though...


October  
Picture


Y'all know I hate doing dishes, right? 
And I'll let them collect for up to 5+ days at a time, right?
Picture


November
Picture
Picture
Just so you get the real effect of how much I hate doing dishes and cleaning up, let's get a good 
long view going on here...
Picture


Picture


Heck, 
even the cat wants out of here!


February
Picture
Picture
Picture
Picture


HA HA HA!!! 
Picture
TRICKED YA ON THAT ONE! 
I cleaned up that crappy mess that night. And noooo, the dirty pans were NOT thrown inside the oven. 
This time anyway.

And trust me, these cats were no help either!
Picture


April
Picture
Picture
It occurs to me at this point that there are three constants in all these pictures: cat treats, coffee cups, and dirty wine glasses. Huh.
Picture
So this wasn't such a bad week, only two dirty cast iron pans, two baking sheets and one lid.
 Pretty darn good, I'd say!!! I'm actually kind of proud of myself.
Picture
Picture
Picture
Picture


June
Picture
In my defense, this was 24 hours AFTER we celebrated an 80th birthday Open House for Tim's dad. Still. 24 hours. I cleaned it up the next day though, 
48 hours later. 
*patting myself on back*


July 16
Picture
Only thing missing here is cat treats although I do appreciate that the orange fly swatter in back is showcased. 
See the red dotted tumbler up front with plastic wrap over it? 
The tumbler has cider vinegar in there and the plastic wrap has holes in the top to catch fruit flies. Huh. I have no idea whyyyyy the fruit flies are so bad. What?


WAIT!          WAIT!           WAIT!

Before you leave I feel I must redeem myself a little bit here. 


Now SOMETIMES I do clean up after a meal, EEEspecially if I know someone will be coming into the house.  

SOMETIMES I do keep a clean kitchen. Sometimes.

At least I did on January 30 of this year when I took these pics.
Picture
Picture
Picture
Picture
Seeeeeeeeeeeee!!!!! 
I told ya I was capable of cleaning up every now and again!! Seeee!
Picture
Picture
Please note there is not a cat treat bag, dirty coffee cup, or a wine glass full of fruit flies sitting anywhere. Well guess there aren't too many fruit flies in January but still. I'll take those small successes all day long :) 


Okay guys! 
That's enough embarrassment for today :)  
Hope everyone has a good week!
I'll be back next with either a Healthy Mexican Casserole or an awesome Butterscotch Pretzel Chocolate Chip 
Cookie recipe! 

Stay cool y'all, 
and talk at ya soon!!!!

P.S. NO JUDGING!! :):)

Kids and Dads and Moms and Grandmas and Grandpas and Aunties and Uncles Will LOVE This Easy Bacon Cheeseburger Hamburger Pie!

8/1/2015

 
This is a slice of
Easy Bacon Cheeseburger Pie.

Picture


You likey burgers?
You likey bacon?
You likey cheese and a quick Bisquick mix?

Then you'll likey this super quick casserole. 
Use your spices liberally though!


Okay, here's the fixins for this fine
Easy Bacon
Cheeseburger Pie!

Picture
This recipe is from the Betty Crocker website. www.bettycrocker.com


Homemade Bisquick Mix 
Straight outta www.kitchennostalgia.com
Serves: 2 cups
Ingredients
  • 2 cups flour
  • 3 teaspoon baking powder
  • 1 teaspoon salt
  • 2 Tablespoon shortening (butter or margarine)
Instructions
  1. Mix all ingredients. Blend until mixture resembles fine crumbs.
  2. Use as a substitution for Bisquick mix. Store in a dry cool place.
Since I did not have Bisquick mix, here is a quick
4 ingredient recipe for a Bisquick substitute.

www.kitchennostalgia.com.


Anyhoo, let's get started on this quick,
tasty meal!


It's so easy to throw those 4 ingredients together and like magic,
there is your Bisquick mix!


And the cheddar I have been buying lately,
is from Milton, Ia.

Picture
Now to lighten this recipe
a bit,
I used ground turkey breast instead of ground beef.


At Fareway grocery stores,
the price of ground turkey breast has risen to $7.99/lb.

I buy organic free range at the co-op and it's only $5.99/lb.

Go figure.


Picture
Spray up that casserole dish!


Oopsy....

Picture

Gotta find a good old skool CD to plug into the player to get the party started....


Picture
Well, mostly what I had available up in the kitchen was kids' sing-a-long songs and 70s disco CDs.

I was trying to introduce our one and only grandchild,
Little Boy Blue, 
to disco last time he was here.


Picture

And shred up that cheddar cheese
and
dice up that onion!


Now, one is supposed to leave all that good yummy
bacon grease in the pan to start cooking the ground beef, and onion, but....

threw olive oil in and the ground turkey breast and onions right in that skillet and started browning the onions and turkey!
Picture
Anyway, back to the recipe,

cook that bacon up crisp!


Picture


All Little Boy Boy Blue wanted to hear was 1970s Sesame Street vinyl albums though...he loves this 40s vintage player.
(Which is also a super cool short wave radio that gets all kinds of foreign stations in Italian, Portuguese, French and Asian languages.) 

Picture


I'm a bit of a grease
buzz-kill,


so I cleaned out the skillet of the bacon grease and...


Picture


Don't forget
to add the ketchup to the
ground beef or turkey mix!


Picture

Helloooo,

Wonderful!


Picture
Yup! 
Just like this. 


I hope you made up two extra strips so you could sneakily 
eat them...or four...five, six, whatever. It's all good.


Now on to the best part...fry and chop up that yummy bacon!!! Bacon!!! 
Picture
Picture


So now layer the meat in the dish
and throw the Cheddar cheese and bacon on top.


Picture


In a separate bowl,

mix up that Bisquick mix, the eggs 
and 
milk.


Pour into the casserole dish...


Now bake in a 400 degree oven for 20-25 minutes...Mine was in for 25 minutes...
Picture


I notice on the island,

 that Tim and Angie's laptops are dueling for space....
the theme to Deliverance comes to mind....
Dueling Banjos.

This casserole looks and smells fantastic!!!!


Here's Glen Campbell and Ashley Campbell from Glen's Farewell Tour in 2012 playing Dueling Banjos....
Picture


And here is legend Glen Campbell singing one of my (and many others) all time favorite songs evah...Wichita Lineman...


But let's get back to more important stuff...
Picture

...like this cute Iowa plate that I am going to use to showcase this delicious 
Impossibly Easy Bacon Cheeseburger Pie...

Picture
This little slice of Cheeseburger Pie is deceptive.


Even made with ground turkey breast like I did, it is hearty, 
fun 
and 
deee-licious!


Picture


Now we paired this with a 

side condiment of ketchup, 
and it was pretty awesome....


Picture
But one of my friends said she would have paired it with pickles too....
DOY!!!

That's what I did the next day for leftovers and it was fantastic!!!!!


Okay kiddos, that's all I have for today's edition of Angie Makes Readers Kind Of-Sort Of Interested In This Easy, Quick, Tasty, Bacon Cheeseburger Pie...
OH CRAP, WAIT!  
Must post recipe.....
To go directly to the Betty Crocker website recipe, click HERE
Impossibly Easy Bacon Cheeseburger Pie
Straight outta www.bettycrocker.com

Ingredients
6 slices bacon
1 lb lean (at least 80%) ground beef 
1/4teaspoon pepper
1large onion, chopped (1 cup)
1/4cup ketchup
1cup shredded Cheddar cheese (4 oz)
1/2cup Original Bisquick mix
1cup milk
2eggs


Directions

1. Heat oven to 400°F. Spray 9-inch glass pie plate with cooking spray. In 10-inch skillet, cook bacon over medium-high heat 5 to 7 minutes, turning once, until crisp; drain on paper towels. Crumble bacon; set aside.

2. In same skillet, cook beef, pepper and onion over medium-high heat 5 to 7 minutes, stirring occasionally, until beef is thoroughly cooked; drain. Stir in ketchup. Spread in pie plate; sprinkle with cheese and bacon.

3. In medium bowl, stir remaining ingredients with wire whisk or fork until blended. Pour into pie plate.

4. Bake 20 to 25 minutes or until knife inserted in center comes out clean. Serve with additional ketchup if desired.


So in closing I will post a couple pictures...
can you even believe some of the sunsets lately here 
this month????
Picture


Also, a formal introduction to the brand new lift at the 
Turnkey Auto World Headquarters in Frytown, Iowa :):) 


And last but not least are these three little vintage guys wishing y'all a good week and telling y'all to check back soon cause I have some real doozies of recipes to blog about under cooking misadventures!
Picture
No judging on the dirty Pillsbury Dough Boy, these were scrounged out of a box in my barn for this wonderful photo opportunity.
Picture


Okay guys, thanks for checking in!!
Have a great rest of the week,
stay cool, 
and we'll talk at ya soon!!!


    Author

    Angie Madsen
    One half of a team that blends their work and personal life together
    in fun ways.


    Recipes
    Picture
    Click here to access recipes featured on this blog. 


    Categories

    All
    Appetizers
    Beef
    Bread
    Breakfast
    Caring
    Car Stories
    Casserole
    Chicken
    Christmas
    Cooking Misadventures
    Decor
    Desserts
    Fish
    Foosball Okay Football
    Fun Times
    Hot Cars
    I Am A Dork
    Kitchen Stuff
    Pasta
    Pets Pets Pets
    Pork
    Potatoes
    Seasonal
    Side Dish
    Soup
    Special Occasion
    Turkey
    Vegan Or Could Be Vegan
    Vegetables
    Vegetarian


    Archives

    February 2019
    January 2018
    December 2017
    November 2017
    October 2017
    January 2017
    October 2016
    September 2016
    August 2016
    February 2016
    January 2016
    October 2015
    September 2015
    August 2015
    July 2015
    May 2015
    April 2015
    January 2015
    December 2014
    October 2014
    September 2014
    August 2014
    July 2014
    June 2014
    May 2014
    September 2013
    August 2013
    June 2013
    April 2013
    February 2013
    January 2013
    December 2012
    November 2012
    October 2012
    September 2012
    August 2012
    July 2012
    June 2012
    May 2012
    April 2012
    March 2012
    February 2012
    January 2012
    December 2011
    November 2011
    October 2011
    September 2011
    August 2011
    July 2011


Turnkey Auto - Twenty years of a friendly setting of quality vehicles, affordable prices and exceptional service.
Text: 319-331-8796
​Call: 319-683-2850


 1/2 mile west of Frytown on 500th St
1811 500th St SW, Kalona, Ia 52247